
A Windows 8 Recovery Drive gives you access to Advanced Startup Options, a menu full of advanced repair and troubleshooting tools for Windows 8 like Command Prompt, System Restore, Refresh Your PC, Rest Your PC, Automatic Repair, and more.
Once you have a Recovery Drive created on a flash drive, you'll be able to boot from it in the event that Windows 8 no longer starts properly for some reason, in which case these diagnostic tools will come in handy.
Considering its value, one of the first things a new Windows 8 user should do is create a Recovery Drive. If you didn't, and need one now, you'll be happy to know that you can create a Recovery Drive from any working copy of Windows 8, including from another Windows 8 computer in your home, or even a friend's.
Note: A Recovery Drive is the Windows 8 equivalent of a System Repair Disc from Windows 7. If you're using Windows 7, see How To Create a Windows 7 System Repair Disc for that process. See Step 10 below if you're interested in creating a System Repair Disc for Windows 8.
Follow the steps below to create a Windows 8 Recovery Drive:
Difficulty: Easy
Items Required: A flash drive, empty or that you're okay with erasing, with at least 500 MB of capacity
Time Required: Creating a Recovery Drive in Windows 8 should take under 10 minutes.
Applies To: You can create a Recovery Drive this way in any edition of Windows 8 or Windows 8.1.
Here's How:
- Open the Windows 8 Control Panel. Windows 8 includes a tool to create a Recovery Drive and it's most easily accessible from the Control Panel.
- Tap or click on the System and Security link.
Note: You won't see System and Security if your Control Panel view is set to Large icons orSmall icons. In your case, just tap or click on Recovery and then move on to Step 5.
- In the System and Security window, tap or click on the Action Center link at the top.
- In the Action Center window, tap or click on Recovery, located at the bottom of the window.
- In the Recovery window, tap or click on the Create a recovery drive link.
Note: Tap or click Yes if you're prompted with a User Account Control question about theRecovery Media Creator program.
You should now see the Recovery Drive window.
- Connect the flash drive that you plan on using as the Windows 8 Recovery Drive, assuming it's not already connected.
You should also disconnect any other external drives, if only to avoid confusion in later steps.
- Check the Copy the recovery partition from the PC to the recovery drive checkbox if it's available.
Note: This option is usually available on computers that had Windows 8 preinstalled when purchased. If you installed Windows 8 yourself then this option probably isn't available which likely isn't an issue since you probably still have the original Windows 8 disc, ISO image, or flash drive that you used when you installed Windows 8.
Something to consider, if you do choose this option, is that you'll need a much larger flash drive than my recommended 500 MB+. A 16 GB or greater capacity drive will probably be more than enough but you'll be told how much if your flash drive is too small.
- Tap or click on the Next button.
- Wait while Recovery Drive Creator searches for drives available to be used as a Recovery Drive.
- On the Select the USB flash drive screen, choose the drive letter that corresponds to the flash drive you want to use as a Windows 8 Recovery Drive.
Note: If no flash drive is found, but you do have an optical drive, you'll see a Create a system repair disc with a CD or DVD instead link at the bottom of the window. Touch or click on that if you'd like to complete that process, which I explain for Windows 7 here. That tutorial applies perfectly to Windows 8 as well so long as you start it at Step 3.
- Tap or click on the Next button.
- Tap or click on the Create button to begin the Recovery Drive creation process.
Important: Please take note of the warning on this screen: Everything on the drive will be deleted. If you have any personal files on this drive, make sure you've backed up the files.
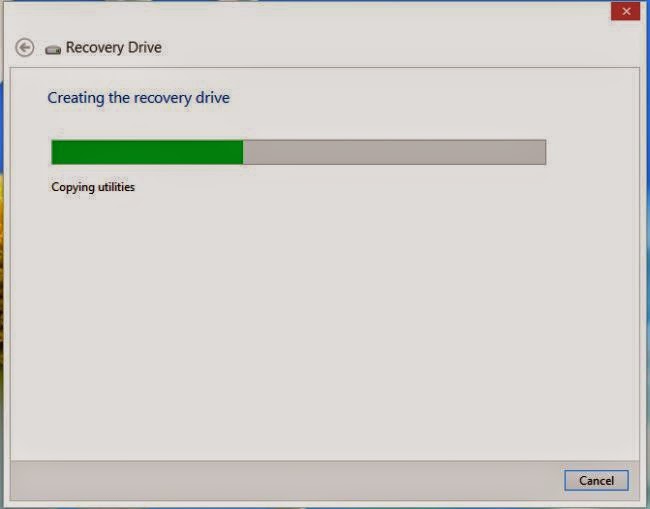
- Wait while Windows 8 creates the Recovery Drive, which involves formatting the flash drive and then copying the necessary files to it.
Depending on your choice in Step 7 above, this process could take anywhere from a few to several minutes.
- When the Recovery Drive creation process is complete, you'll see a The recovery drive is ready message.
Tap or click on the Finish button.
Important: You're not done yet! The most important two steps are yet to come.
- Label the flash drive. Something like Windows 8 Recovery Drive should make pretty obvious what this drive is for.
The last thing you want to do is toss a valuable but unlabeled flash drive in your drawer that has four other ones in there too, which brings me to my last point:
- Store the flash drive somewhere safe. What a waste of time to create a Recovery Drive and then have no idea what you did with it!
I keep mine in the pencil holder on my desk, but I know several people who keep things like this in their home safe, right next to their passports. Anywhere safe and memorable will work.
No comments:
Post a Comment